
Got a little off topic there, Back to JP29. Carpet went back in today, Wow looks awesome with clean carpet in there. Getting the carpet back in around the gear shifts is the hardest part.
Made a trip to the pull a part today. They had 5 jeeps from 88-95. All almost completely picked over. Drat! and they have them in the premium section so they want double for parts off them. I was hoping to get some full doors, but those were long gone. I did get the grey driver side seatbelt to replace the one in mine that has a cut 1/2 way through it. The did not have the center dash pod panel, or rather the other people grabbing parts broke both of the gray ones while getting to other parts. So then I called up one of the Jeep parters in town and he had one so, I swung by and picked it up on the way back to the house. The Jeep parter had one front seat and one rear seat, but both were in almost as bad a shape as my existing seats, so I passed on those.
Other than seats those were the only two things I needed to get the interior in order.
When I got home from all that, I cleaned up the center cluster panel, and started messing with the seat belt. The one I picked up was totally frozen up, so I dissassembled, and cleaned out all the muck and grime from sitting in the junk yard. Let it air out and dry for a few hours, and now it works like a charm. Installed that and the center panel so All is well!
Ignore the seats in the following carpet pic, as I have not worked on cleaning them up yet.
Colorado JP #29
Re: Colorado JP #29
- Attachments
-
- Carpet looks so nice now!!!!
- DSC_0078s.JPG (132.83 KiB) Viewed 20853 times
1993 Sahara - JP29 - Denver, CO
-
weapon lxxxi
- Posts: 456
- Joined: October 4th, 2011, 12:29 pm
- Location: South coast UK
- Contact:
Re: Colorado JP #29
that carpet looks amazing, good job
Re: Colorado JP #29
Score. Got a replacement backseat off craigslist that is in pretty nice shape. Only one very minor scuff. $125 !!!!! All seams intact, and color mostly good. the top of the backseat of course has some fading... As if any seat that hasn't been stored for 20 years wouldn't be a little faded on top.
The new seat is from a 95, since it has the spice carpet on the bottom of the seat. And I noticed too that the 93 seat is a more blueish green, and the 95 seat is a more forest green. Interesting... Ugh As if that doesn't make all this even trickier. Still probbaly only I would notice such a thing and if you never put them right next to one another you'd probably never notice, even next to my 93 front seats you probably won't notice.
Enjoy the pics. Old Seat on Left, new on the Right.
Old Seat frayed and unfixable in middle and seam pulled out on left
New seat.. Nice even before I clean it!
The new seat is from a 95, since it has the spice carpet on the bottom of the seat. And I noticed too that the 93 seat is a more blueish green, and the 95 seat is a more forest green. Interesting... Ugh As if that doesn't make all this even trickier. Still probbaly only I would notice such a thing and if you never put them right next to one another you'd probably never notice, even next to my 93 front seats you probably won't notice.
Enjoy the pics. Old Seat on Left, new on the Right.
- Seat Compare
- DSC_0029s.JPG (139.54 KiB) Viewed 20835 times
- Old seat horribleness...
- DSC_0030s.JPG (99.49 KiB) Viewed 20835 times
- New Seat
- DSC_0031s.JPG (92.07 KiB) Viewed 20835 times
1993 Sahara - JP29 - Denver, CO
Re: Colorado JP #29
Ok so, The pockets on the door panels. The rear corner gets caught on the seat belt, and the corner tries to pull away from the door panel.
The pockets are held on with these strange screw connections...
I was originally considering removing the pockets and replacing the backing material holding the pockets in shape. Now that I have seen these strange screw connections. I am concerned that once removed they wont hold, and trying to remove them.. what kind of tool would I even use.
Now I am considering just using a flat headed bolt of some sort in the very corner of the pocket to hold it back in place. Since the backer for the pockets looks like some paper composite/cardboardy like material I was thinking if I get it damp and reshape it down, and then put the bolt in the corner I would be set.
Has anyone addressed this issues with the pockets? if so how'd you do it?
- Pocket corner
- DSC_0036s.JPG (95.34 KiB) Viewed 20823 times
- Screw Holding on pockets
- DSC_0037s.JPG (21.55 KiB) Viewed 20823 times
Now I am considering just using a flat headed bolt of some sort in the very corner of the pocket to hold it back in place. Since the backer for the pockets looks like some paper composite/cardboardy like material I was thinking if I get it damp and reshape it down, and then put the bolt in the corner I would be set.
Has anyone addressed this issues with the pockets? if so how'd you do it?
1993 Sahara - JP29 - Denver, CO
-
ImperialTrooper

- Site Administrator
- Posts: 882
- Joined: July 12th, 2010, 6:32 am
- Location: Las Vegas, NV
- Contact:
Re: Colorado JP #29
I have the same issue, and I was thinking the best way is to either use a rivet, or chicago screws.

Re: Colorado JP #29
Yes something like those is what I was thinking... I was hoping to find something black though, so it hides a little better.
On my lunch break today I headed over to the jeep dealer and inquired about the wellnuts I needed. They told me the trunk was not a factory option, and hence why it is not in their parts system, he couldn't help me, and when he finally came up with something he thought was right he wanted $5 for one.
So I have been scouring the web tonight, looking for the correct wellnuts I needed. Since Both Lowes and Homedepot have wellnuts but not in the exact size I needed. While I am 90% sure the ones they had would have worked (smaller head and shorter in overall length) I liked the larger head of the existing ones, as I figure it will keep the carpet from moving around better.
Evidently I have the ultra rare Mopar add-a-trunk offered when the jeep was new. http://www.factorychryslerparts.com/sho ... bly=533074 It has the correct carpet which is why I am assuming this to be the case. I have to assume However mine seems slightly different then the one pictured as that one clearly states it need 4 "Rev-nuts" and 2 "latches" Mine also has no holes in it. I would bet the pieces changed slightly over the yj model years, and the diagram never changed...
Regardless by this point I had tracked down the correct wellnuts as used previously and found a part number and located some both locally and online. The local ones were clear across town, and more expensive, so shipping was cheaper, so they should arrive. The wellnuts used to hold my trunk in have a 3/4 inch head on the and clearly say "wellnut J1032". I had to measure all the dimensions of the old ones, lucky one was not mangled so I used it for my measurements. I found the J1032 ones online, but no place I found was a click and order place it was a submit a request for a quote. Those places typically want large quanitites, so I found one by another manufacturer that matched the dimensions. AuVeCo Part #17586.
My add-a-trunk also has some strange bracket on the underside of the top. Mounting point for something... Fire extinguisher maybe? alternate location for jack? Anyone have any ideas?
On my lunch break today I headed over to the jeep dealer and inquired about the wellnuts I needed. They told me the trunk was not a factory option, and hence why it is not in their parts system, he couldn't help me, and when he finally came up with something he thought was right he wanted $5 for one.
So I have been scouring the web tonight, looking for the correct wellnuts I needed. Since Both Lowes and Homedepot have wellnuts but not in the exact size I needed. While I am 90% sure the ones they had would have worked (smaller head and shorter in overall length) I liked the larger head of the existing ones, as I figure it will keep the carpet from moving around better.
Evidently I have the ultra rare Mopar add-a-trunk offered when the jeep was new. http://www.factorychryslerparts.com/sho ... bly=533074 It has the correct carpet which is why I am assuming this to be the case. I have to assume However mine seems slightly different then the one pictured as that one clearly states it need 4 "Rev-nuts" and 2 "latches" Mine also has no holes in it. I would bet the pieces changed slightly over the yj model years, and the diagram never changed...
- Add A Trunk
- DSC_0038s.JPG (81.07 KiB) Viewed 20819 times
My add-a-trunk also has some strange bracket on the underside of the top. Mounting point for something... Fire extinguisher maybe? alternate location for jack? Anyone have any ideas?
- Bracket?
- DSC_0039s.JPG (83.85 KiB) Viewed 20819 times
1993 Sahara - JP29 - Denver, CO
-
ImperialTrooper
- Site Administrator
- Posts: 882
- Joined: July 12th, 2010, 6:32 am
- Location: Las Vegas, NV
- Contact:
Re: Colorado JP #29
COBrian wrote:Yes something like those is what I was thinking... I was hoping to find something black though, so it hides a little better.
I would do it on the inside of the pocket so it doesnt show at all.
Re: Colorado JP #29
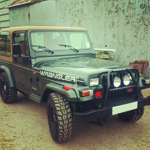
So My jeep has a rally top, that was originally spice in color, but the PO painted it brown.... why I have no idea (you can see it in some other pics I've posted, and the roof is very faded). For refreshers here is the jeep with the top on..
Redninja had posted a mocked up hardtop idea on the paint forum, which I like.. Here it is
But since I have to paint mine anyway I am considering painting the top sand beige to match the rest of the jeep...
I will be doing the over the top stripe for sure. The "hard half upper doors with sliders" I would paint to match the rest of the top either spice or sand beige. But they don't seal off too well so I may pick up some full doors to swap out during winter.
So thoughts.. votes... Spice hard top or Sand Beige Hard top??
- Jeep Top
- jeep2.jpg (72.25 KiB) Viewed 20808 times
- Spice Hardtop mockup
- jpjeep.jpg (55.8 KiB) Viewed 20808 times
- Sand Beige HardTop
- jpjeep2.jpg (77.94 KiB) Viewed 20808 times
So thoughts.. votes... Spice hard top or Sand Beige Hard top??
1993 Sahara - JP29 - Denver, CO

Re: Colorado JP #29
In the pic your top looks smooth where mine had a rough texture. If it is smooth you might be able to get away with painting the top sand beige since the two surfaces would have a similar finish.COBrian wrote:So thoughts.. votes... Spice hard top or Sand Beige Hard top??
If the top does have a rough texture I'd have to vote for spice but if it has a smooth finish I might have to rethink that partially because it would be a unique look.
1993 Jeep Wrangler Sahara
JP #21
Oklahoma State Dinosaur: Saurophaganax which can be seen in Oklahoma at The Sam Noble Museum
JP #21
Oklahoma State Dinosaur: Saurophaganax which can be seen in Oklahoma at The Sam Noble Museum
Re: Colorado JP #29
I went camping over the holiday weekend, but never fear I did some work last week during the week. Progress continues...
Last weekend and this week during the week I was working on a hard top lift/hoist. Since I will mostly not be using the hard top, and I wanted to get all my vehicles back into the garage, getting the hardtop out of the way certainly needed doing...
I originally had looked up other people's ideas/homemade options for a hard top lift, and most had used eye bolts and most also had exposed rafters. As you can see my garage is drywalled, and has living space above it, so accessing the rafters was not going to happen. I designed a lift originally based on what I had seen others do. I Know my house uses I-Joists (these are engineered wood beams nailing/screwing surface on both sides of a central composite beam). I looked up the tech data on these beams and they can support 500 lbs per 5' section for bottom load. (for the ones used in my ceiling, different sizes have different load ratings, if you are using bottom hangin loads from an I-joist, look up the tech data!) I then looked up the strength of fasteners. a 3/8" lag bolts has a 308lb/inch pull out rating.
Taking these into account I decided to use a 2x4 across 2 joists, using 1 3/8 lag bolt inserted into each joist flange 1.25 inches. (taking into account the thickness of both the 2x4 and drywall I was going through, 1.5" 2x4 and 5/8" firerated drywall) So I used 3.5" lag bolts, giving me penetration around 1.325". This gives me around 400lbs at each connection point. given the ~400lb pullout rating I probably could have just skipped the 2x4 across 2 joists, but I wanted to spread the load out across more than one I-joist.
The commercial ones just have 1 ceiling attachment point in the center of the roof and a large bracket that attaches to front and rear, but I went with one pull location at the front and one at the rear of the top. Again to distribute the weight across more attachment points.
Originally I used Eyebolts only at both the ceiling and wall, as many homebuilt systems just used eyebolts, but I found the friction was causing too much load, and making raising and lowering the top horribly hard. This might have been due to the rope I choose, but regardless I ended up swapping to eyehooks and pulleys. And the final piece was the winch. I purchased a 600lb "boat" winch from amazon (cheapest I found, and I love 2 day shipping), to use as my crank. I lag bolted this into my wall so that it is 6 feet and a few inches off the ground, so as long as you leave the crank handle in the up position you won't bump your head on it, and it's still easy enough for me to reach and crank standing on the ground.
The system is basically a beam at both front and back with an eye hook at it's center and eye hooks at both ends. The center eyehook has the main pull line attached to it, which goes to the ceiling, over to the wall, and down to the crank. The eye hooks at each end are attached to lines that go around the front of the hard top, and from the back through the rear window opening and connect underneath the top with the front lines. Originally this was only rope lines, but to tighten it up after attaching them together, I replaced one with a ratchet strap.
The ratchet strap was rated at #300 lbs working load, and the rope is rated at #244 lbs working load. So the weakest link is the rope in the whole system. The top is less than #200lbs. Since there are 2 main ropes, neither is carrying the full weight, and the 4 ropes that "cradle" the top from front and rear also share the load. In other words I probably overengineered the whole thing, but since it hangs over a vehicle I wanted to be extra cautious.
In my overcautious design, I also attached 2 more eyebolts to each of my 2x4 cross members in the ceiling, and for long term storage, I use a couple of 4 straps from the ends of my hanging beams to the ceiling cross beams, so for long term storage it is hanging by both main lines, and 4 straps... it ain't going anywhere!
I have an 11' ceiling in my garage and I wanted to lift the top above my garage door, to both minimize used space in case I build any shelves up there, or lift up bicycles or something else. When the garage door is open the garage door goes about 4 inches below where the front of the top hangs... So without further ado, here are the images...
Note: since I am using rope for the cradle, if they are not exactly the same length the hanging cross beams end up not hanging level, even though the top does.. I need to adjust the length of one of the lines shown in this pic.
Side benefit to using rope for cradle, is the rear hatch can be closed as the lines don't foul up the hinges, like may of the "hook" based top hoists.
Last weekend and this week during the week I was working on a hard top lift/hoist. Since I will mostly not be using the hard top, and I wanted to get all my vehicles back into the garage, getting the hardtop out of the way certainly needed doing...
I originally had looked up other people's ideas/homemade options for a hard top lift, and most had used eye bolts and most also had exposed rafters. As you can see my garage is drywalled, and has living space above it, so accessing the rafters was not going to happen. I designed a lift originally based on what I had seen others do. I Know my house uses I-Joists (these are engineered wood beams nailing/screwing surface on both sides of a central composite beam). I looked up the tech data on these beams and they can support 500 lbs per 5' section for bottom load. (for the ones used in my ceiling, different sizes have different load ratings, if you are using bottom hangin loads from an I-joist, look up the tech data!) I then looked up the strength of fasteners. a 3/8" lag bolts has a 308lb/inch pull out rating.
Taking these into account I decided to use a 2x4 across 2 joists, using 1 3/8 lag bolt inserted into each joist flange 1.25 inches. (taking into account the thickness of both the 2x4 and drywall I was going through, 1.5" 2x4 and 5/8" firerated drywall) So I used 3.5" lag bolts, giving me penetration around 1.325". This gives me around 400lbs at each connection point. given the ~400lb pullout rating I probably could have just skipped the 2x4 across 2 joists, but I wanted to spread the load out across more than one I-joist.
The commercial ones just have 1 ceiling attachment point in the center of the roof and a large bracket that attaches to front and rear, but I went with one pull location at the front and one at the rear of the top. Again to distribute the weight across more attachment points.
Originally I used Eyebolts only at both the ceiling and wall, as many homebuilt systems just used eyebolts, but I found the friction was causing too much load, and making raising and lowering the top horribly hard. This might have been due to the rope I choose, but regardless I ended up swapping to eyehooks and pulleys. And the final piece was the winch. I purchased a 600lb "boat" winch from amazon (cheapest I found, and I love 2 day shipping), to use as my crank. I lag bolted this into my wall so that it is 6 feet and a few inches off the ground, so as long as you leave the crank handle in the up position you won't bump your head on it, and it's still easy enough for me to reach and crank standing on the ground.
The system is basically a beam at both front and back with an eye hook at it's center and eye hooks at both ends. The center eyehook has the main pull line attached to it, which goes to the ceiling, over to the wall, and down to the crank. The eye hooks at each end are attached to lines that go around the front of the hard top, and from the back through the rear window opening and connect underneath the top with the front lines. Originally this was only rope lines, but to tighten it up after attaching them together, I replaced one with a ratchet strap.
The ratchet strap was rated at #300 lbs working load, and the rope is rated at #244 lbs working load. So the weakest link is the rope in the whole system. The top is less than #200lbs. Since there are 2 main ropes, neither is carrying the full weight, and the 4 ropes that "cradle" the top from front and rear also share the load. In other words I probably overengineered the whole thing, but since it hangs over a vehicle I wanted to be extra cautious.
In my overcautious design, I also attached 2 more eyebolts to each of my 2x4 cross members in the ceiling, and for long term storage, I use a couple of 4 straps from the ends of my hanging beams to the ceiling cross beams, so for long term storage it is hanging by both main lines, and 4 straps... it ain't going anywhere!
I have an 11' ceiling in my garage and I wanted to lift the top above my garage door, to both minimize used space in case I build any shelves up there, or lift up bicycles or something else. When the garage door is open the garage door goes about 4 inches below where the front of the top hangs... So without further ado, here are the images...
- Top is up!
- Hard Top Lift 044s.JPG (119.43 KiB) Viewed 20790 times
- Winch, just above head bump height!
- Hard Top Lift 045s.JPG (55.75 KiB) Viewed 20790 times
- Changed to Pulleys
- Hard Top Lift 046s.JPG (69.98 KiB) Viewed 20790 times
- Extra security.
- Hard Top Lift 047s.JPG (73.98 KiB) Viewed 20790 times
1993 Sahara - JP29 - Denver, CO
Who is online
Users browsing this forum: No registered users and 14 guests