My explorer keychain
- DrewSmith007
- Site Moderator
- Posts: 725
- Joined: February 3rd, 2011, 10:44 pm
- Vehicle Make/Model: 1993 Ford Explorer
- Location: Wichita, KS
- Contact:
My explorer keychain
I whipped this up today
It's more of a prototype. I'm having a hard time with the bubbles... That's what those dark spots on the yellow border are.
Re: My explorer keychain
When you get the kinks worked out I'll take one
1993 Jeep Wrangler Sahara
JP #21
Oklahoma State Dinosaur: Saurophaganax which can be seen in Oklahoma at The Sam Noble Museum
JP #21
Oklahoma State Dinosaur: Saurophaganax which can be seen in Oklahoma at The Sam Noble Museum
- ratrace427
- Completed JP Jeep
- Posts: 950
- Joined: February 29th, 2012, 4:47 pm
- Location: Tulsa, Ok
- Contact:
Re: My explorer keychain
How do you whipp something like that up? That is awesome. One please!
I am John Sisemore on Facebook
- DrewSmith007
- Site Moderator
- Posts: 725
- Joined: February 3rd, 2011, 10:44 pm
- Vehicle Make/Model: 1993 Ford Explorer
- Location: Wichita, KS
- Contact:
Re: My explorer keychain
Well, it was a little more involved than that. I modeled it in 3d, then had shapeways print it since it's features are too small for my reprap.
Then, I molded it in silicone, and cast it with yellow tinted resin.
Next, I spray painted it with black paint, and then sanded through that paint to reveal the yellow border.
The red part is just red vinyl cut on my plotter.
I'm still having trouble with bubbles...
If I can sort out the bubble problem (it's not bubbles in the resin, but trapped air when I pour) I'll make a bunch.
- ratrace427
- Completed JP Jeep
- Posts: 950
- Joined: February 29th, 2012, 4:47 pm
- Location: Tulsa, Ok
- Contact:
Re: My explorer keychain
Pour the resin from a high distance. As the resin travels down to the mold it will get thinner and thinner in diameter stretching and popping the air bubbles. You want the resin to be a very fine stream going into the mold. You will have zero bubbles but takes longer to fill the mold.
I am John Sisemore on Facebook
- DrewSmith007
- Site Moderator
- Posts: 725
- Joined: February 3rd, 2011, 10:44 pm
- Vehicle Make/Model: 1993 Ford Explorer
- Location: Wichita, KS
- Contact:
Re: My explorer keychain
The problem with bubbles isn't coming from the bubbles in the resin, but comes from the trapped air when the resin flows down into the deep parts of the mold. It's thick enough that it touches the far side before it hits the bottom, and thus traps the air.
I think I've figured out a way to do these anyway, but it'll be a little more work for you guys. Here's a link to have shapeways print them for you. All you have to do is paint and apply the decal, which I would mail you.
EDIT: I just updated the price to include the decal.
http://www.shapeways.com/model/836760/k ... -inventory
Let me know if you order one, and what number you want.
I might order another one in the red color, paint it black, then sand through like the one I already did. Then use a yellow decal...
- DrewSmith007
- Site Moderator
- Posts: 725
- Joined: February 3rd, 2011, 10:44 pm
- Vehicle Make/Model: 1993 Ford Explorer
- Location: Wichita, KS
- Contact:
Re: My explorer keychain
I also might make another one that is just the circle without the box. Can any of you guys think of a cool design?
Re: My explorer keychain
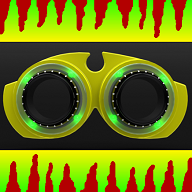
When I cast, I uses a vacuum and pressure chamber. Vacuum chambers aren't cheap (my vacuum pump was about $400), but I built a reliable pressure chamber using a Harbor Freight pressurized paint pot. If you want details, let me know. A decent shop compressor will be required.DrewSmith007 wrote: If I can sort out the bubble problem (it's not bubbles in the resin, but trapped air when I pour) I'll make a bunch.
You might also want to try this trick. Buy some very fine syringes and run the needle carefully in the air pockets after you pour. I used this trick when I was casting some of Doc Ock's 'suckers' for his arms from the original production molds. It worked like a charm.
View my past, present, and future projects on: http://www.facebook.com/SephiriStudios
Who is online
Users browsing this forum: No registered users and 28 guests