Starting up JP15 in Washington
Re: Starting up JP15 in Washington
JP15 is coming along nicely!!! I'm really enjoying watching the build.
-
Jurassic Vic
- Site Administrator
- Posts: 396
- Joined: February 23rd, 2015, 3:22 pm
- Vehicle Make/Model: 93 Jeep Wrangler Sahara
- Location: Houston, TX
- Facebook Profile URL: https://www.facebook.com/vicjurassic
- Instagram: Jurassic_vic
- Contact:
Re: Starting up JP15 in Washington
Whoa whoa whoa, first of all, let me begin with the doors came out amazing. Always love seeing my pouches installed on customers vehicles.xennocide wrote:Hey guys,
Its been a couple weeks and I've had work piling up but I do have some awesome updates!
The doors are done and installed!
Maybe one of you guys can answer a question, as you can see in the last pic, there is a gap between the half door and the upper. I understand that I am missing the door channel, will that close up the gap or am I doing something wrong installing it?


Second, that light bar looks incredible. GREAT work on it and a great price. Looks original mopar so good job. It seems a tad bit too tall tho, but other than that it looks great.
You mentioned "original trail cloth" Is that the fabric used for the sahara seats? How much is it per yard and where did you get it??
Keep up the good work!
A new era. join the Jurassic Auto Group facebook page
https://www.facebook.com/groups/jurassicautogroup
FOLLOW THE VLOG AND PODCAST
https://linktr.ee/jurassic_vic
Jurassic Park Jeep commissions message me!
https://www.facebook.com/groups/jurassicautogroup
FOLLOW THE VLOG AND PODCAST
https://linktr.ee/jurassic_vic
Jurassic Park Jeep commissions message me!
Re: Starting up JP15 in Washington
Thanks guys,
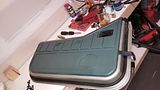
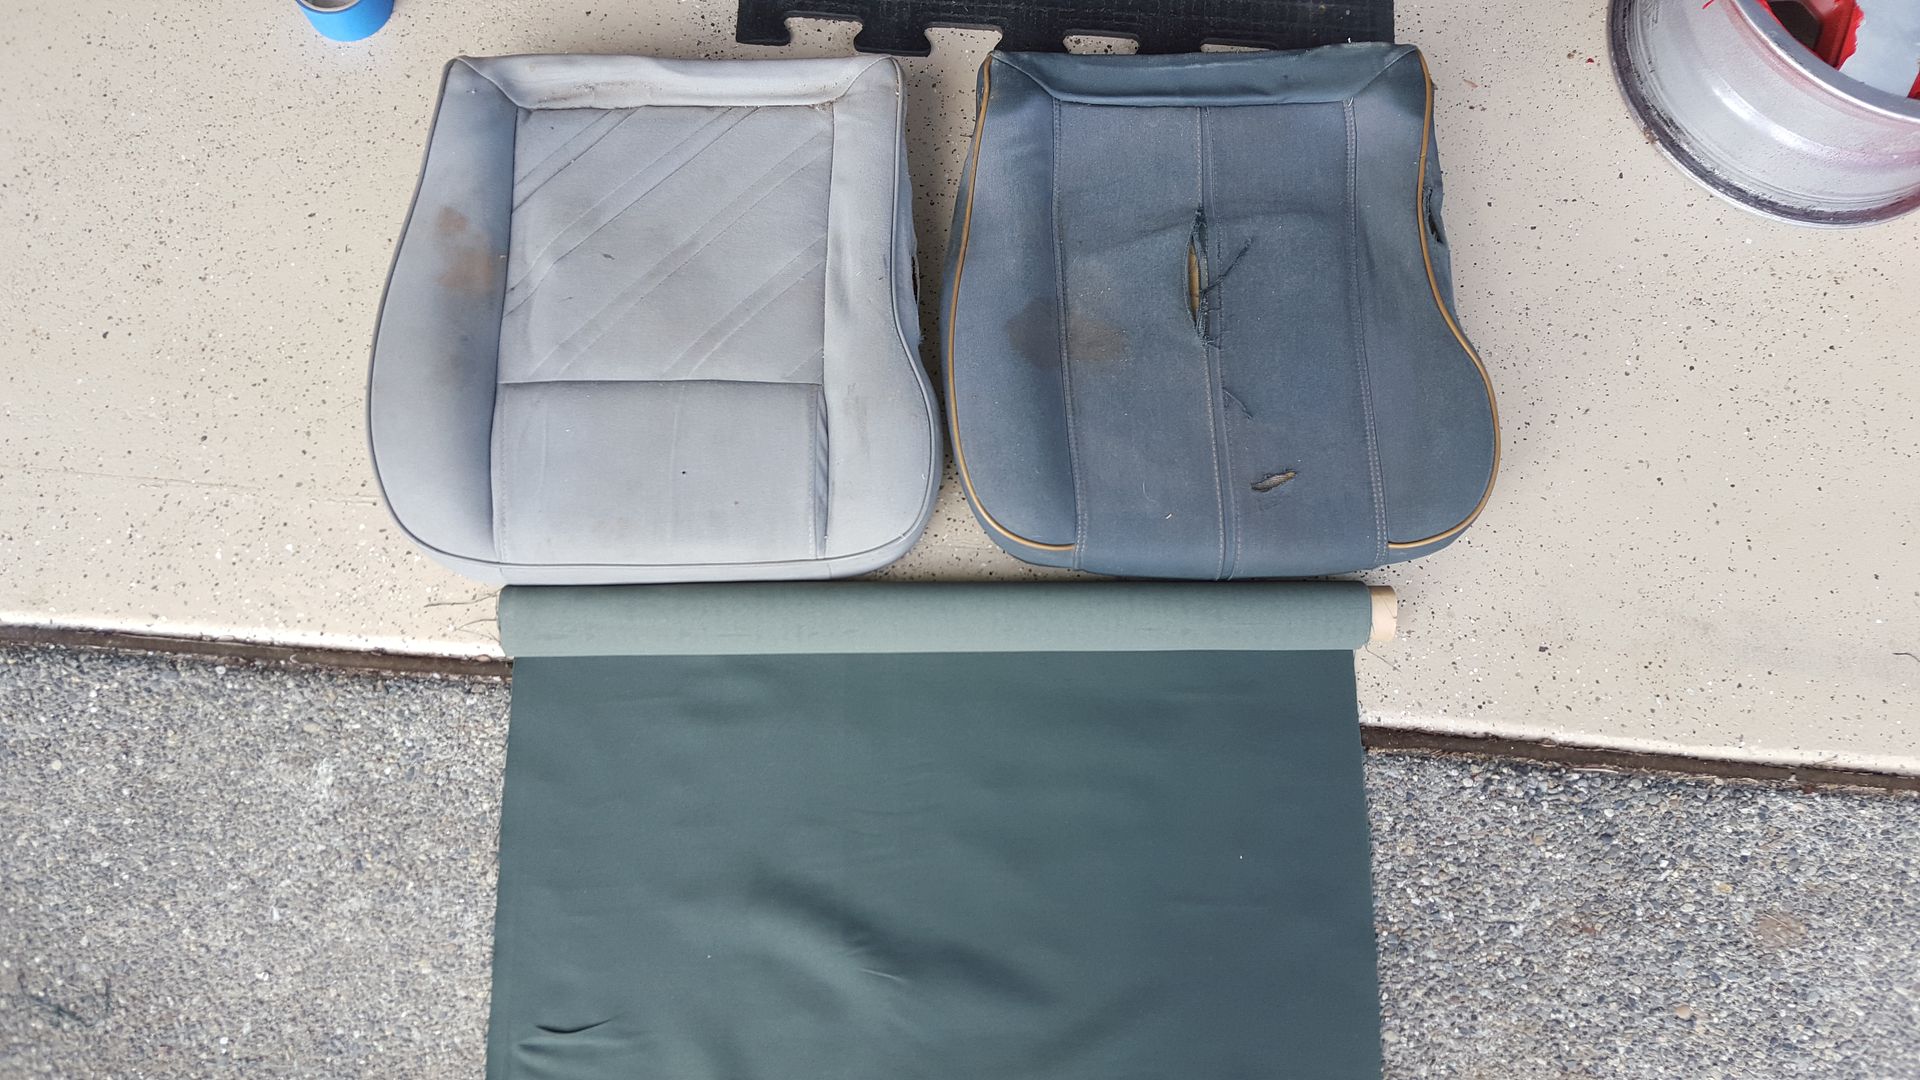
I've had a few of you asking about the 'original trail cloth' and yes it is OEM and its not cheap. The website I ordered from is www.originalauto.com and runs $99/yard. They will sell it in portions as small as 1/6th yard and the rep I was working with was very helpful with quoting how much fabric I'd need. I snapped the pic below before heading out to work this morning and it shows the poor condition of the original drivers seat, the new donor, and the trail cloth (this came wrapped with the inside facing out to protect the outward side of the fabric which is much darker and matches the original. I'll document it more before it goes out to the upholsterer.
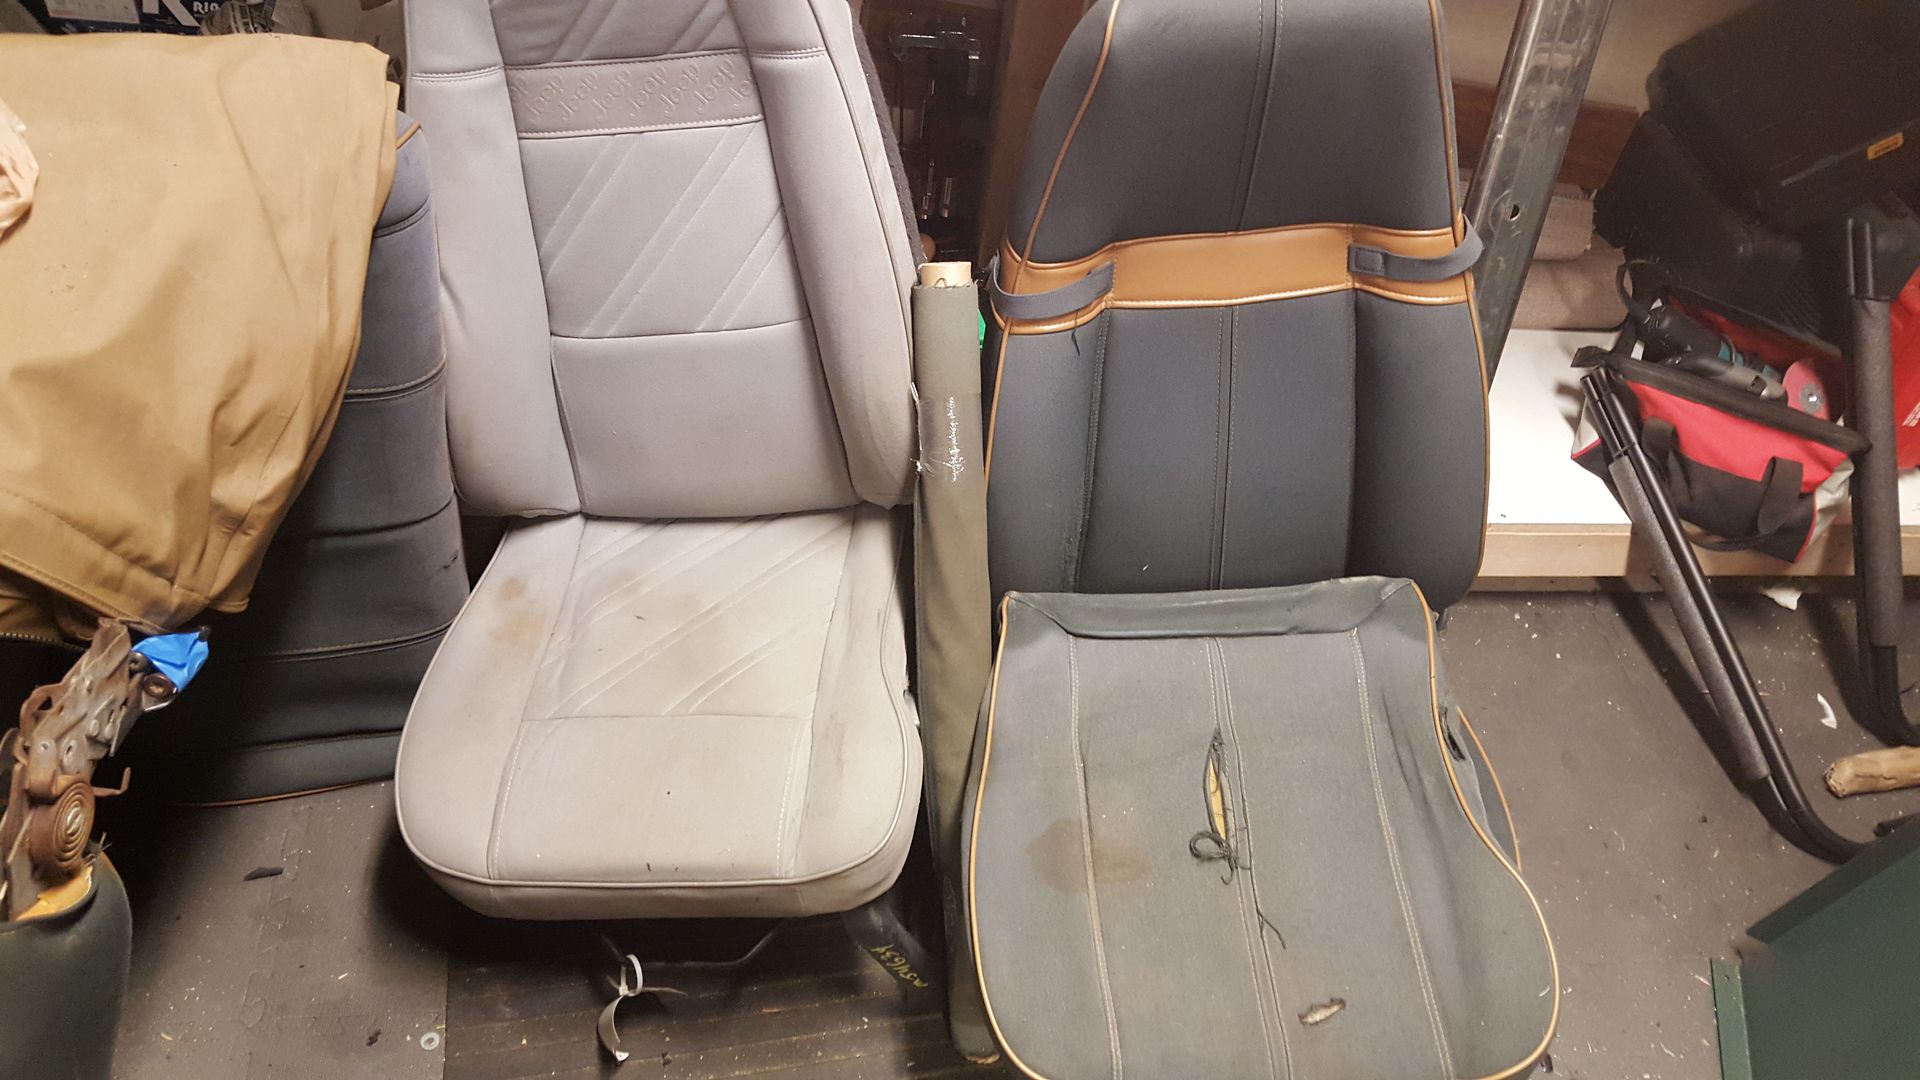
I've had a few of you asking about the 'original trail cloth' and yes it is OEM and its not cheap. The website I ordered from is www.originalauto.com and runs $99/yard. They will sell it in portions as small as 1/6th yard and the rep I was working with was very helpful with quoting how much fabric I'd need. I snapped the pic below before heading out to work this morning and it shows the poor condition of the original drivers seat, the new donor, and the trail cloth (this came wrapped with the inside facing out to protect the outward side of the fabric which is much darker and matches the original. I'll document it more before it goes out to the upholsterer.

-
RustyRodder
- Posts: 273
- Joined: February 24th, 2010, 12:06 am
- Contact:
Re: Starting up JP15 in Washington
How many yards are needed?
JP25- Jurassic Park Maintenance, 1988 Jeep Comanche
viewtopic.php?f=20&t=2680
viewtopic.php?f=20&t=2680
Re: Starting up JP15 in Washington
For just the seat cushion, I was told 30" which is 5/6th yardRustyRodder wrote:How many yards are needed?
Re: Starting up JP15 in Washington
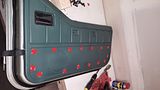
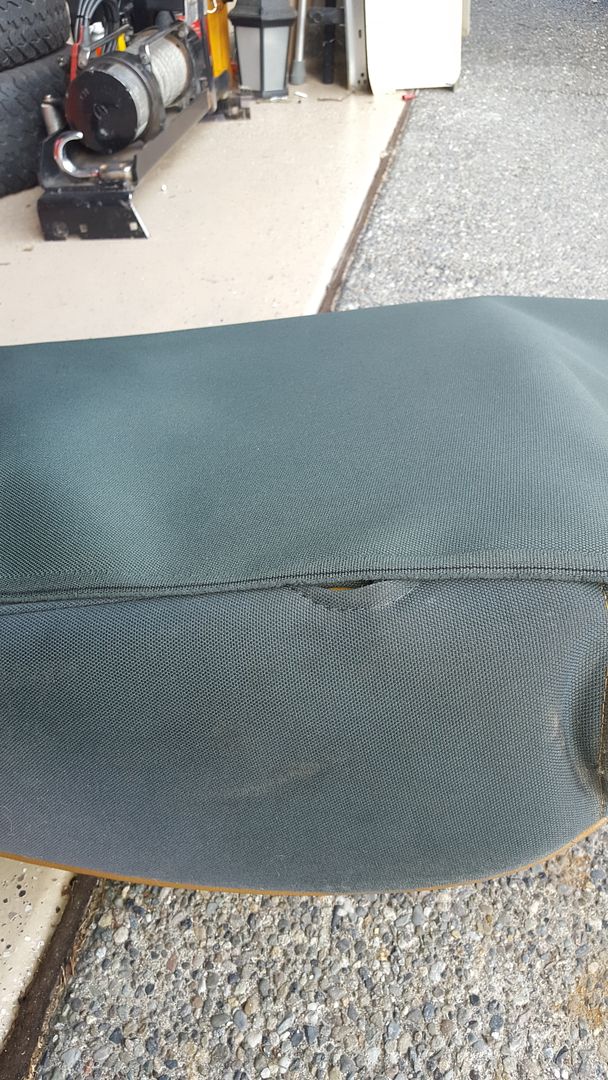
Seat went out to the upholster over the weekend. The shop I am using is small out of his garage but he'd done sahara seats in the past and was only quoting $75-100 to do the repair. Here is the seat with the new material, it looks much darker in the pic but that just shows you how much fading has occurred. If you compare it to the back of one of the upppers that didn't see much sun you get an actual reference to what these seats looked like new. The material is #5044 Jeep Wrangler Trail Cloth


-
Jurassic Vic
- Site Administrator
- Posts: 396
- Joined: February 23rd, 2015, 3:22 pm
- Vehicle Make/Model: 93 Jeep Wrangler Sahara
- Location: Houston, TX
- Facebook Profile URL: https://www.facebook.com/vicjurassic
- Instagram: Jurassic_vic
- Contact:
Re: Starting up JP15 in Washington
Fabric looks great. Can't wait to see reupholstered seats using original material
A new era. join the Jurassic Auto Group facebook page
https://www.facebook.com/groups/jurassicautogroup
FOLLOW THE VLOG AND PODCAST
https://linktr.ee/jurassic_vic
Jurassic Park Jeep commissions message me!
https://www.facebook.com/groups/jurassicautogroup
FOLLOW THE VLOG AND PODCAST
https://linktr.ee/jurassic_vic
Jurassic Park Jeep commissions message me!
Re: Starting up JP15 in Washington
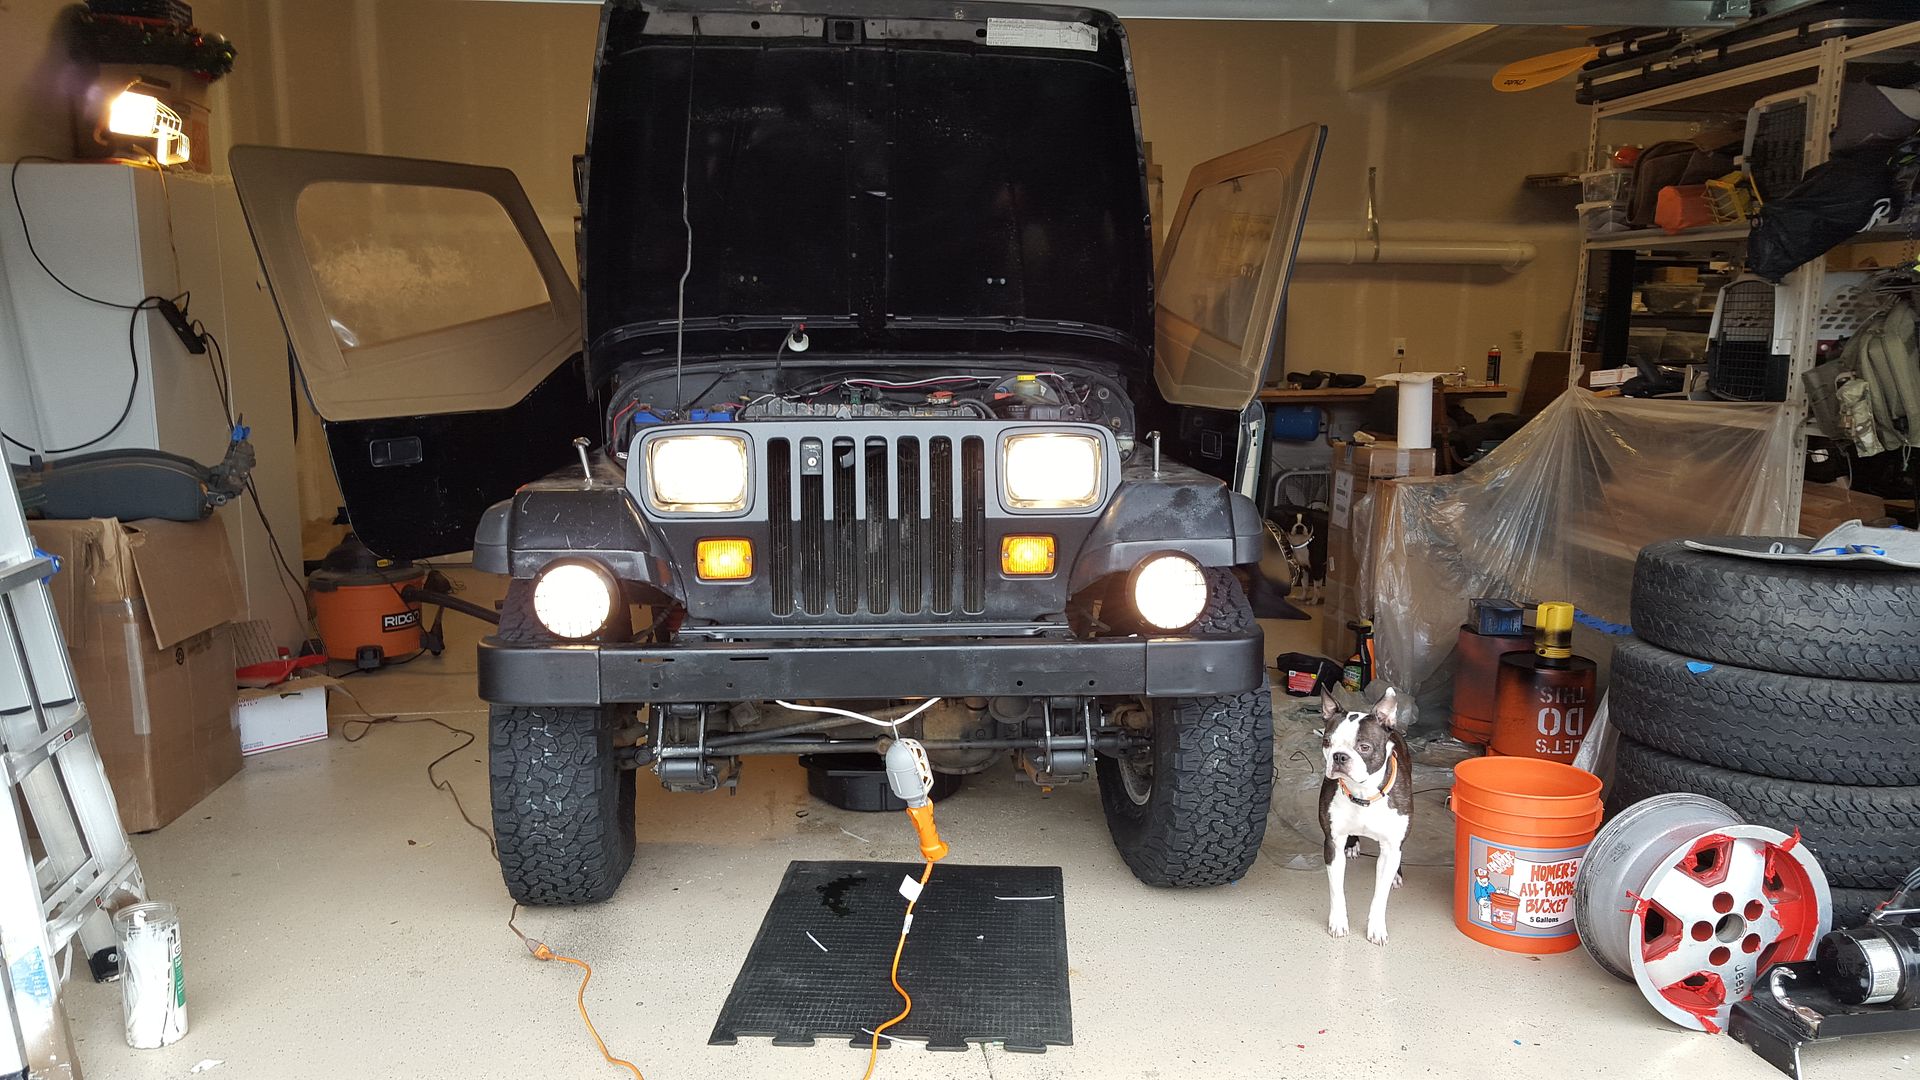
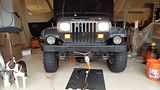
After taking care of some family obligations last week, I had the whole weekend to work in the jeep so this will be a pretty lengthy update.
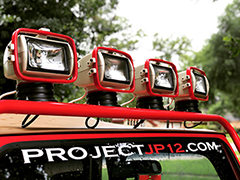
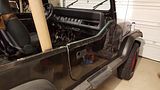
I tackled the electrical system and lights first. The PO had done a lot of splicing for a security system and full audio speakers/base in the back. I gutted as much of this as I felt comfortable but in all honesty, the whole wiring harness should probably be replaced sometime in the future. I had 3 objectives to complete 1. Front fog lights, 2. Rear amber lights, 3. Replace cig lighter (cut out from stock to allow cb mount)
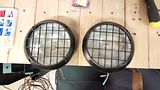
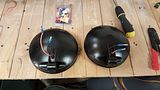
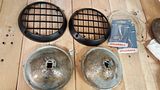
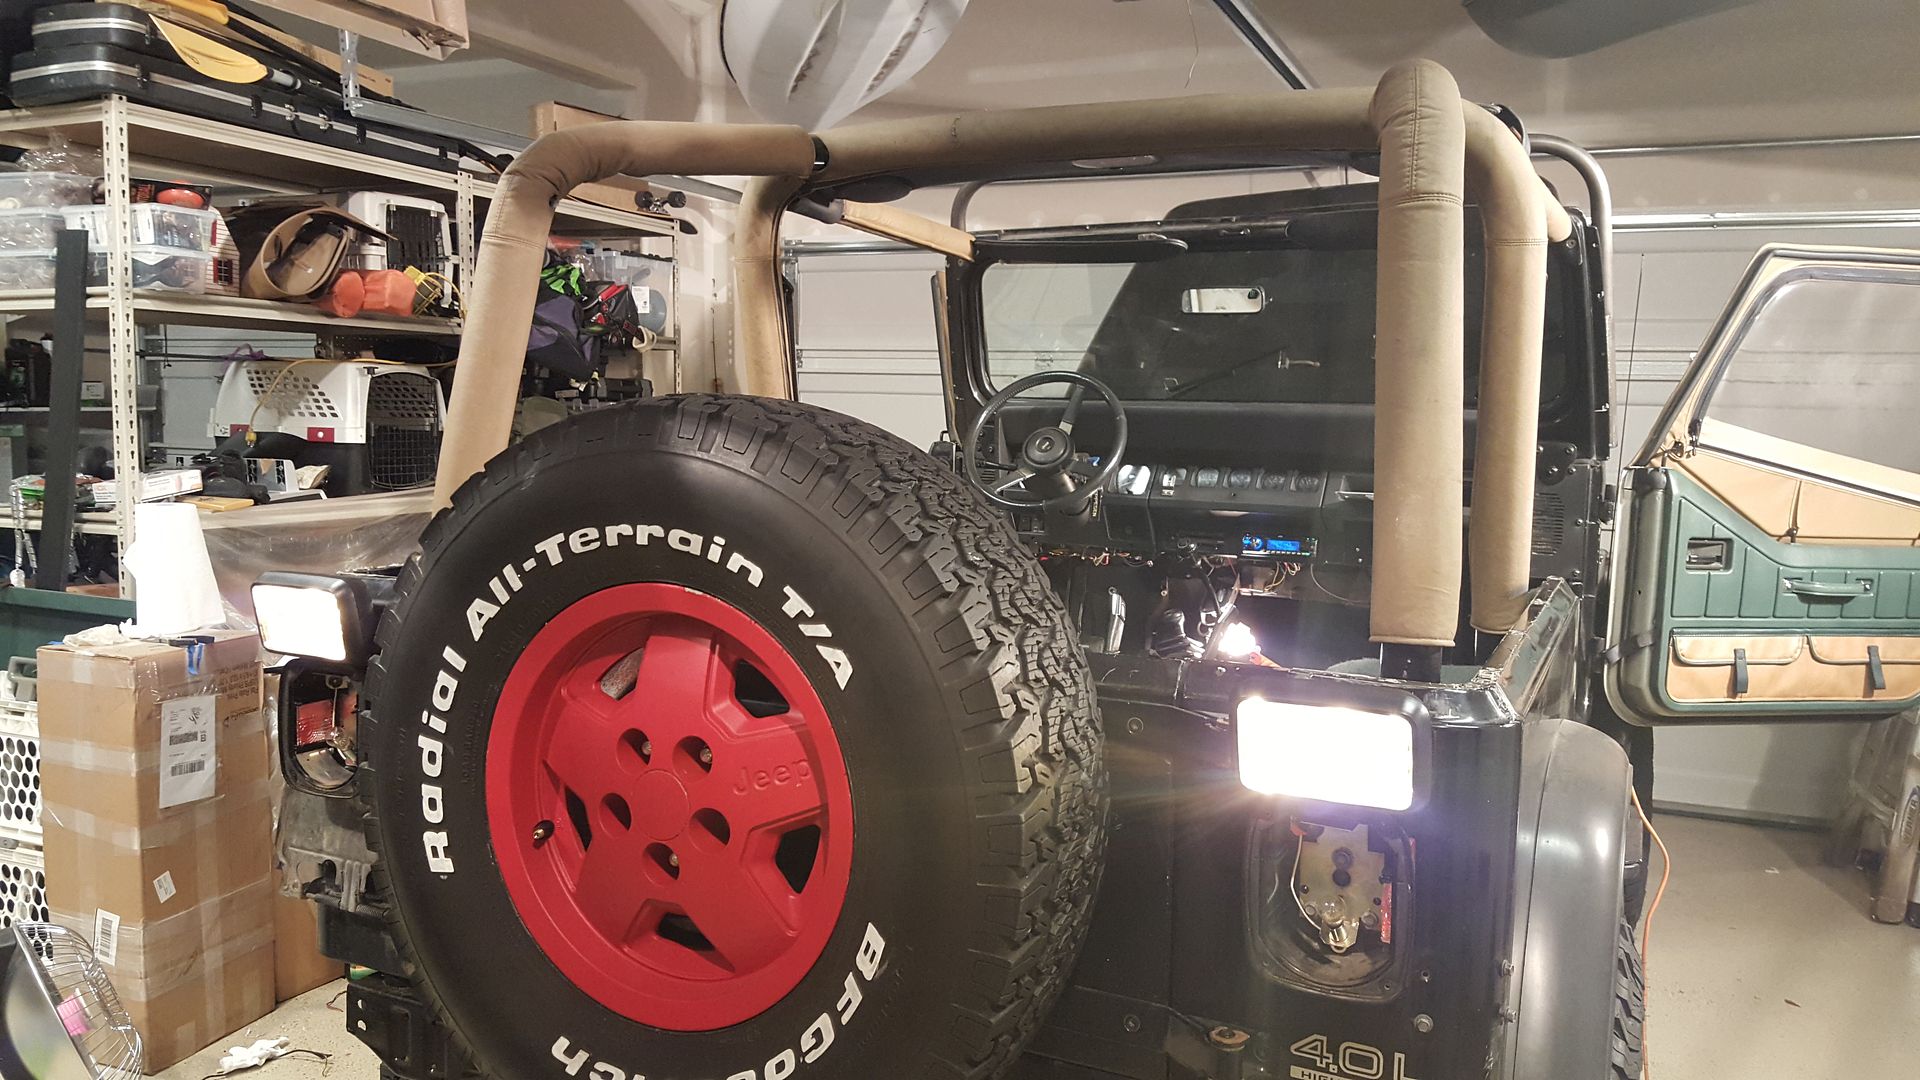
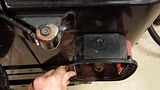
I picked up that lightbar down in portland a couple months ago with 4 foglights on it. 2 of these ended up being undamaged with the plastic shells in perfect condition, I cleaned up and painted the plastic shells and took the reflectors out and knocked as much rust off them as possible + replaced the bulbs and added new wiring. They turned out looking great and wired correctly so they are tied into the low beam lights on an independent switch

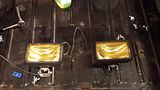
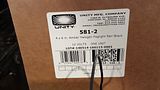
For the rear fog lights, I gave up searching for a set of the correct KCs and opted for the Unity 4x6 amber that were discussed on the forum here. I think they looked pretty close to the KCs without the little cover tabs and was able to pick up a new set including the wiring for $79. The first thing I discovered while figuring out how to attach these lights is this jeep was subletting part of the tub to a family of birds (or Mynocks)
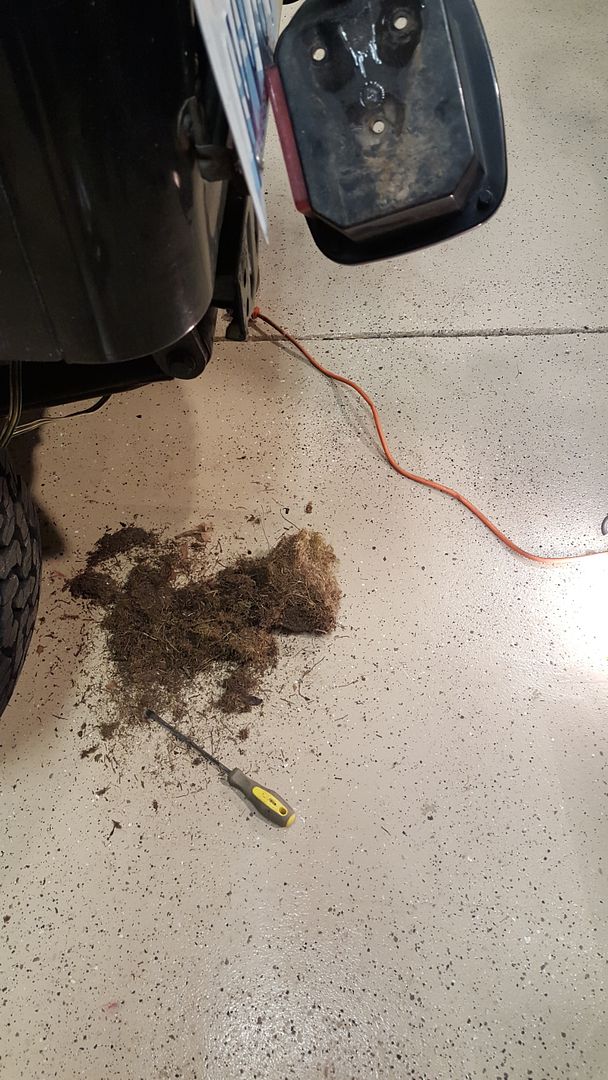
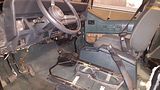
The Unity lights came with 1 lead wire with about a 6" tail and ground to the mounting bracket. This was just long enough to run from the right tail light over to the left access point and make the splice there. I then ran the wire back along the same path as the taillight wiring harness which runs on the left side of the cab and all the connections can be made under the dashboard. I spliced power for the rear fog lights in from the cig lighter so they can be independently turned on. This is also where I decided to get rid of the CB radio mounting plate and chopped up cig lighter. I installed a dual usb/cig lighter and mounted it below the heater. I know this is not standard for the JP Jeeps but its one of the areas I decided to deviate from the movie jeep for practical reasons.

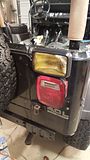
Since I was messing with the wires in the back, I took the opportunity to move the license plate to the back center under the wheel and add a light tied into the rear lights to make it legal and free up the original plate location for the JP plate that I will be ordering soon. I also drilled holes in the front bumper for the front plate and attached it after taking these pics, this leaves the front right location free for the front JP plate.

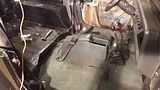
More work on the interior:
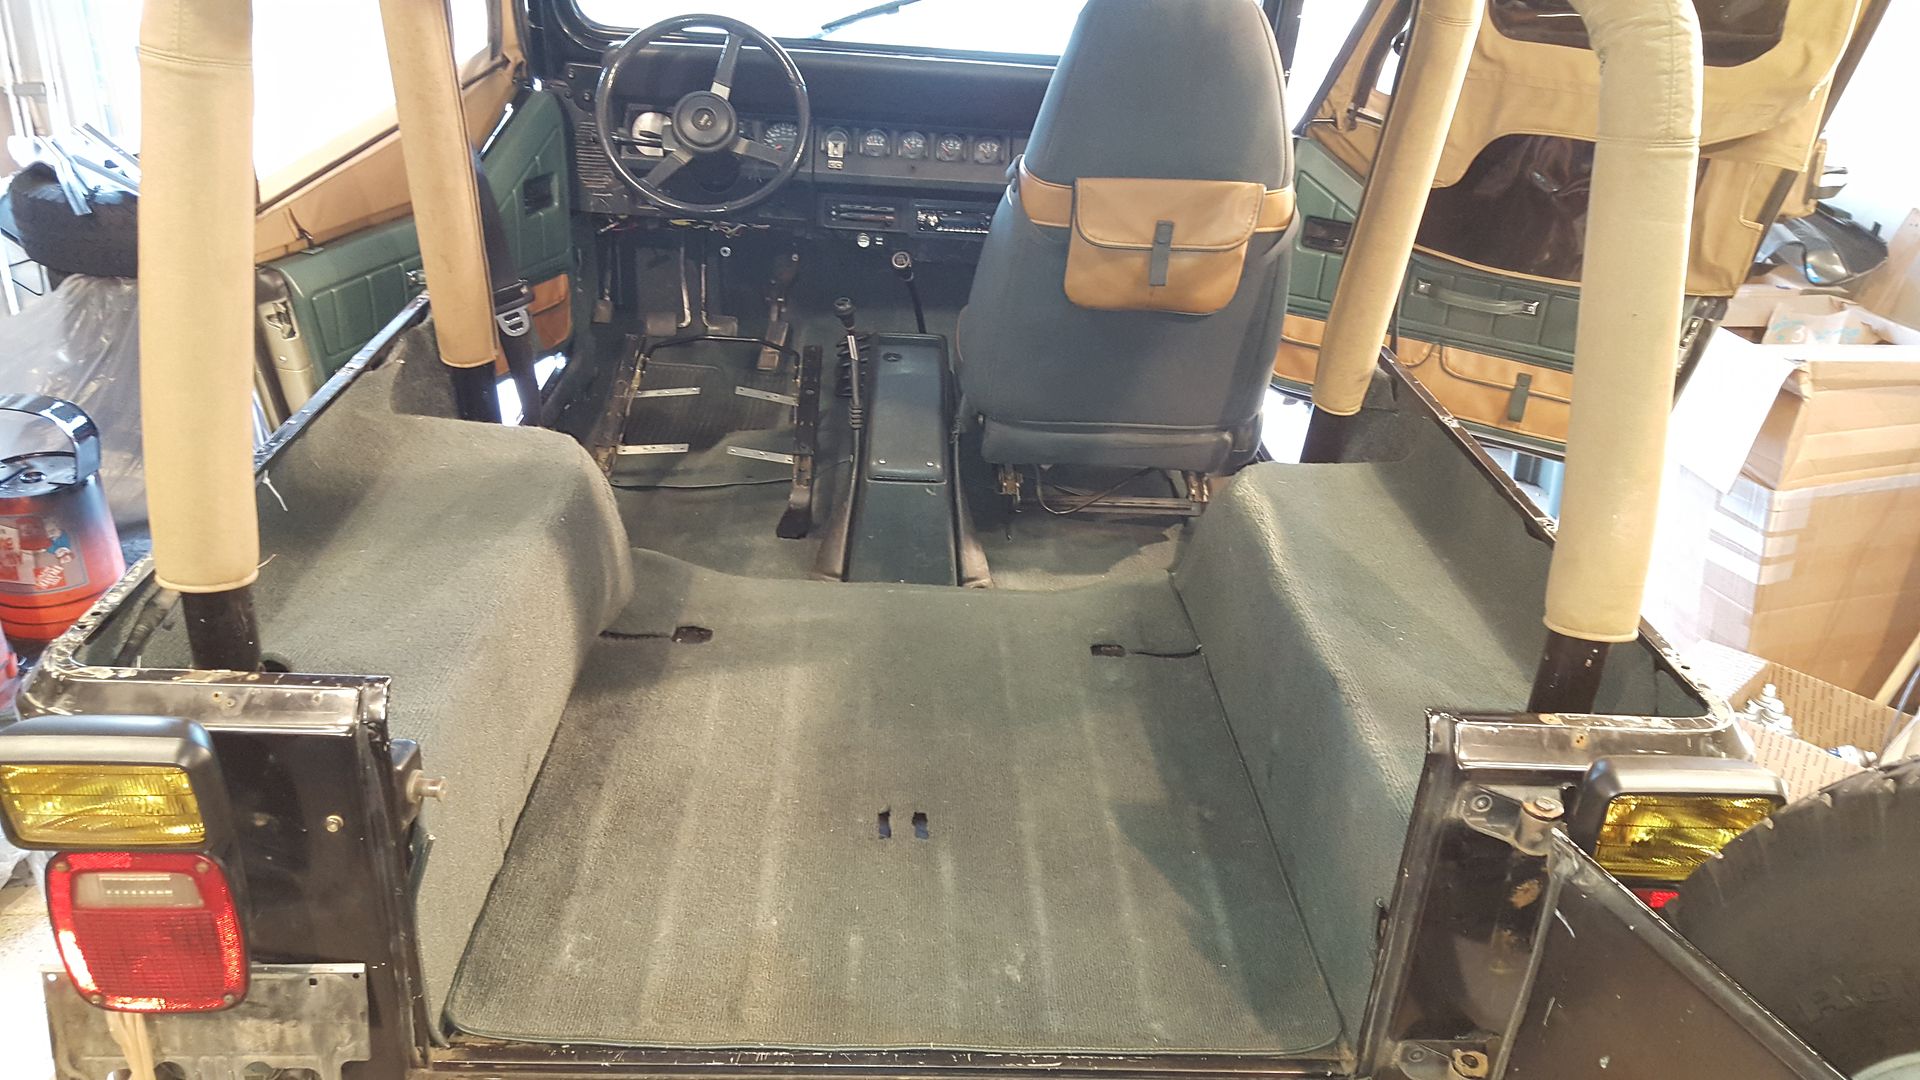
Full carpet set installed. Figured out how the kick panels went it and yes, the note on taking off the seat belt retractors helped quite a bit! Installed the center console, both seat brackets, and the passenger seat (the driver's side is still out getting reupholstered)
I tackled the electrical system and lights first. The PO had done a lot of splicing for a security system and full audio speakers/base in the back. I gutted as much of this as I felt comfortable but in all honesty, the whole wiring harness should probably be replaced sometime in the future. I had 3 objectives to complete 1. Front fog lights, 2. Rear amber lights, 3. Replace cig lighter (cut out from stock to allow cb mount)
I picked up that lightbar down in portland a couple months ago with 4 foglights on it. 2 of these ended up being undamaged with the plastic shells in perfect condition, I cleaned up and painted the plastic shells and took the reflectors out and knocked as much rust off them as possible + replaced the bulbs and added new wiring. They turned out looking great and wired correctly so they are tied into the low beam lights on an independent switch


For the rear fog lights, I gave up searching for a set of the correct KCs and opted for the Unity 4x6 amber that were discussed on the forum here. I think they looked pretty close to the KCs without the little cover tabs and was able to pick up a new set including the wiring for $79. The first thing I discovered while figuring out how to attach these lights is this jeep was subletting part of the tub to a family of birds (or Mynocks)

The Unity lights came with 1 lead wire with about a 6" tail and ground to the mounting bracket. This was just long enough to run from the right tail light over to the left access point and make the splice there. I then ran the wire back along the same path as the taillight wiring harness which runs on the left side of the cab and all the connections can be made under the dashboard. I spliced power for the rear fog lights in from the cig lighter so they can be independently turned on. This is also where I decided to get rid of the CB radio mounting plate and chopped up cig lighter. I installed a dual usb/cig lighter and mounted it below the heater. I know this is not standard for the JP Jeeps but its one of the areas I decided to deviate from the movie jeep for practical reasons.


Since I was messing with the wires in the back, I took the opportunity to move the license plate to the back center under the wheel and add a light tied into the rear lights to make it legal and free up the original plate location for the JP plate that I will be ordering soon. I also drilled holes in the front bumper for the front plate and attached it after taking these pics, this leaves the front right location free for the front JP plate.

More work on the interior:
Full carpet set installed. Figured out how the kick panels went it and yes, the note on taking off the seat belt retractors helped quite a bit! Installed the center console, both seat brackets, and the passenger seat (the driver's side is still out getting reupholstered)


Re: Starting up JP15 in Washington
For this week, I've got the bumperettes sanded down and primed, will try to install those tonight. I also am going to test fit the soft top. Other parts on order I am waiting to come in are the soft top windshield channel, half door channels, rear seat brackets, steering wheel stabilizer, jp license plates, spare tire boot, new switch lights -I gotta find pics of what was used originally. And then I'm probably going to start looking at auto paint shops
Re: Starting up JP15 in Washington
It's really coming together! Looks good! Can't wait to see the upholstered seats 
Did you use an original sahara carpet or is it aftermarket?
Did you use an original sahara carpet or is it aftermarket?
Who is online
Users browsing this forum: No registered users and 21 guests