
Sand beige.T-rex23 wrote:Very nice, I love watching everyone's progress, what are you using for your main color?
Jurassic Park Jeep #12
Re: Jurassic Park Jeep #12
1971 Volkwagen Beetle - 1993 Jeep Wrangler Sahara - 1998 Dodge Neon R/T
http://www.GBFans.com/ - http://www.JurassicJeep.com/
http://www.GBFans.com/ - http://www.JurassicJeep.com/
Re: Jurassic Park Jeep #12
So it all adds up pretty quickly.
I was just looking into why my credit card had such a high balance.
So far I have spent $3000 on parts / related items for the Jeep. + $4000 Purchase price.
I blame Boomerjinks.
I was just looking into why my credit card had such a high balance.
So far I have spent $3000 on parts / related items for the Jeep. + $4000 Purchase price.
I blame Boomerjinks.
1971 Volkwagen Beetle - 1993 Jeep Wrangler Sahara - 1998 Dodge Neon R/T
http://www.GBFans.com/ - http://www.JurassicJeep.com/
http://www.GBFans.com/ - http://www.JurassicJeep.com/
-
Boomerjinks

- Completed JP Jeep
- Posts: 460
- Joined: December 10th, 2009, 11:09 am
- Contact:
Re: Jurassic Park Jeep #12
SPARED NO EXPENSE
Re: Jurassic Park Jeep #12
Those $9000 Jeep Saharas that were on eBay are looking pretty good right now.
1971 Volkwagen Beetle - 1993 Jeep Wrangler Sahara - 1998 Dodge Neon R/T
http://www.GBFans.com/ - http://www.JurassicJeep.com/
http://www.GBFans.com/ - http://www.JurassicJeep.com/
Re: Jurassic Park Jeep #12
The rusty area that we found yesterday was wire wheeled and the bad area was identified. The area to be cut out was marked in yellow paint. There is a little bit of rust extending out of this area, but it is for the post part surface rust. The remaining metal is plenty thick for securing to.

Here the bad metal was completely cut out. A 1/2″ thick border was left to secure to.

A 16 gauge patch panel was cut out to fit over the area.

The panel was tack welded into place and then a bead was put around the whole patch.

Next step will be to seal the underside with seam sealer and paint. After that.. we start prepping for the herculiner!
Here the bad metal was completely cut out. A 1/2″ thick border was left to secure to.
A 16 gauge patch panel was cut out to fit over the area.
The panel was tack welded into place and then a bead was put around the whole patch.
Next step will be to seal the underside with seam sealer and paint. After that.. we start prepping for the herculiner!
1971 Volkwagen Beetle - 1993 Jeep Wrangler Sahara - 1998 Dodge Neon R/T
http://www.GBFans.com/ - http://www.JurassicJeep.com/
http://www.GBFans.com/ - http://www.JurassicJeep.com/
-
Cyrix9445

- Site Administrator
- Posts: 797
- Joined: November 17th, 2009, 9:15 pm
- Vehicle Make/Model: Ford Explorer
- Location: Orlando, FL
- Facebook Name: Brandon Constant
- Facebook Profile URL: https://www.facebook.com/jurassicparkexplorer04/
- Instagram: cyrix9445
- Contact:
Re: Jurassic Park Jeep #12
he has answered that question more then once.T-rex23 wrote:Very nice, I love watching everyone's progress, what are you using for your main color?
Re: Jurassic Park Jeep #12
Yeah, but I'm like a gold fish, I have bad memory.....
Re: Jurassic Park Jeep #12
About to lay down the first coat of Herculiner!
Wish me luck!
Wish me luck!
1971 Volkwagen Beetle - 1993 Jeep Wrangler Sahara - 1998 Dodge Neon R/T
http://www.GBFans.com/ - http://www.JurassicJeep.com/
http://www.GBFans.com/ - http://www.JurassicJeep.com/
Re: Jurassic Park Jeep #12
I am now finally getting around to putting down the Herculiner. I had originally planned to start this back on Friday. Now that it is Sunday, I’m a bit behind. This is due to the rust spot that had to be patched yesterday and the VERY subborn bolts that were broken off.
The first step in applying Herculiner is to clean up everything. You need a very clean (and rough) surface to apply the paint to. I used a wire wheel to scuff up the surface and then hit it with the scouring pad that was included in the Herculiner kit. The kit by the way is available at most autopart stores and costs about $90 for the kit.
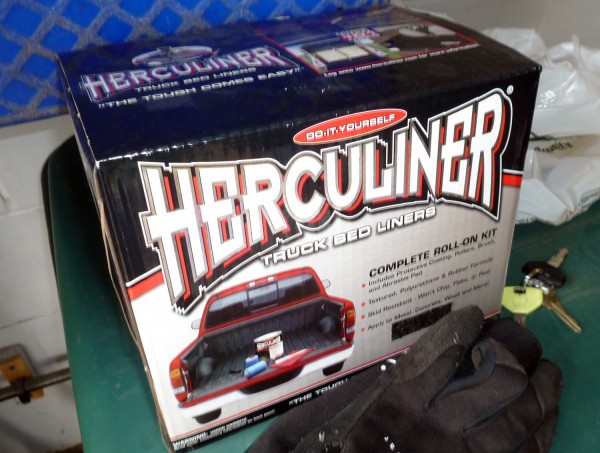
The next step will be to mask off all the areas that you don’t want the coating. It is going to be very thick, and very strong. You don’t want this covering up drain holes or flowing into bolt holes. This is one of the most important steps in the process. If you get the Herculiner somewhere you don’t want it, getting it off will be difficult.

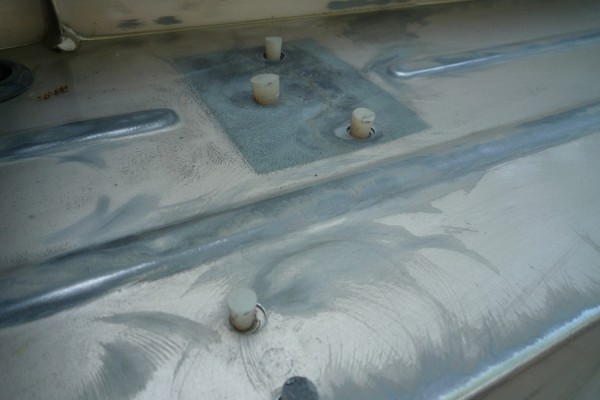
For the holes I used silicone hole plugs. These things are typically used in Powder Coating situations where you don’t want powder getting into holes. Nothing sticks to silicone (except silicone), so hopefully I can just yank the plugs out of the holes and remove the herculiner sitting on them. We will see… but so far this is the easiest solution.
The application of Herculiner is fairly straight forward, but this stuff is pretty thick! Its not going to be like normal paint, as it has chunks of rubber in it. Using a paint brush you first go after all the corners and hard to reach areas. Then using the roller, you apply a thin coat. It should be thin, almost transparent. It would be wise to thin the Herculiner with Xylene for this first coat (I however did not).

The first coat needs to set for 1 to 4 hours. So I think I will work on something else while it is setting.
The first step in applying Herculiner is to clean up everything. You need a very clean (and rough) surface to apply the paint to. I used a wire wheel to scuff up the surface and then hit it with the scouring pad that was included in the Herculiner kit. The kit by the way is available at most autopart stores and costs about $90 for the kit.
The next step will be to mask off all the areas that you don’t want the coating. It is going to be very thick, and very strong. You don’t want this covering up drain holes or flowing into bolt holes. This is one of the most important steps in the process. If you get the Herculiner somewhere you don’t want it, getting it off will be difficult.
For the holes I used silicone hole plugs. These things are typically used in Powder Coating situations where you don’t want powder getting into holes. Nothing sticks to silicone (except silicone), so hopefully I can just yank the plugs out of the holes and remove the herculiner sitting on them. We will see… but so far this is the easiest solution.
The application of Herculiner is fairly straight forward, but this stuff is pretty thick! Its not going to be like normal paint, as it has chunks of rubber in it. Using a paint brush you first go after all the corners and hard to reach areas. Then using the roller, you apply a thin coat. It should be thin, almost transparent. It would be wise to thin the Herculiner with Xylene for this first coat (I however did not).
The first coat needs to set for 1 to 4 hours. So I think I will work on something else while it is setting.
1971 Volkwagen Beetle - 1993 Jeep Wrangler Sahara - 1998 Dodge Neon R/T
http://www.GBFans.com/ - http://www.JurassicJeep.com/
http://www.GBFans.com/ - http://www.JurassicJeep.com/
Who is online
Users browsing this forum: No registered users and 27 guests